

Today I’m going to show you a little trick you can use to save your buyers time using the Gumroad overlay in your Leadpages template.
It bypasses the Gumroad product preview page and renders the payment form upon clicking the buy button on your page.
Like this:
You might be asking: “Why wouldn’t I just send them to the Gumroad page to purchase?”
Well, I guess you could but they aren’t the best sales pages – kinda like homepages.
Sure, people may buy your product directly on the Gumroad page but they’ll need to be in the “most aware” state of buyer awareness.
And my guess is that 80% of your prospects fall into “problem aware”.
To get them from problem aware to most aware, you’re going to need room to write some of your sweet sales copy (ex: a sales page) and then give them the opportunity to buy your product on that page.
And what if you are selling multiple versions of your Gumroad product (as you should be) using a pricing table?
Well, I’m about to teach you.
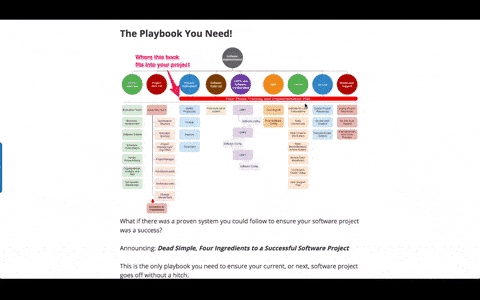
And give you the opportunity to download the same sales page template I’m using to sell multiple tiers of my product.
This post will show you how you can use your sales page, in this case a Leadpages template, to sell your Gumroad products using a lesson known tactic to open up the credit card field after they click the buy button as shown in the GIF above.
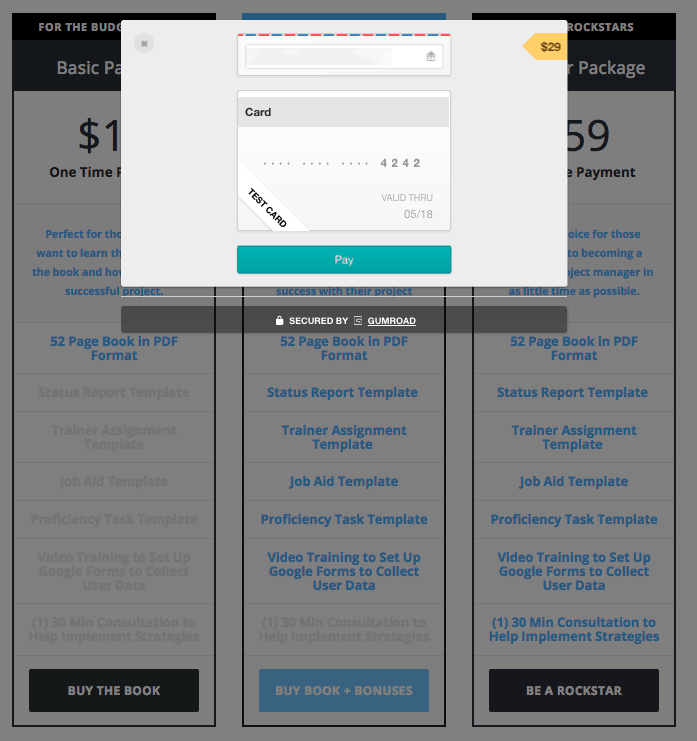
It makes it super easy for those who have said “yes” and are ready to buy and just need to enter their payment information.
Realistically, you can do this Gumroad but it can only be done using a drop-down field. It’s not ideal because you’ve got to write out each package on the small sales page.
Here’s how it looked when I first setup my product before I discovered this lesser known way of getting people to buy.
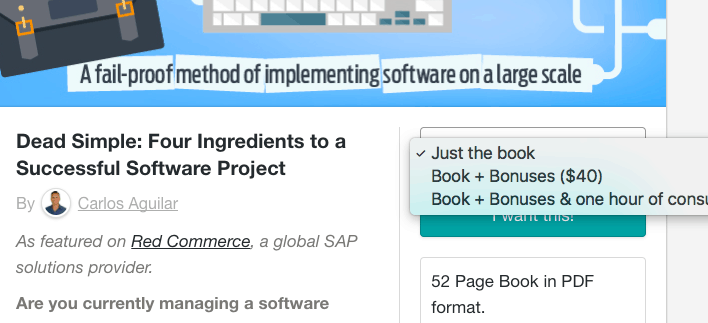
And then below was copy explaining the benefit of each tier.
It was clunky and just too much for a prospect to deal with.
Here’s how you can do the same for your products.
Note: you may want to have Gumroad and Leadpages open so you can follow along.
Step 1) Create your product(s) on Gumroad
First things first, you’ll need to create your product on Gumroad so you can sell it (duh!).
If you haven’t done this yet, simply follow these instructions.
Step 2) Get the Gumroad overlay code
Click on your product name for the product you want to add to your sales page.
Then click on the “share” tab.
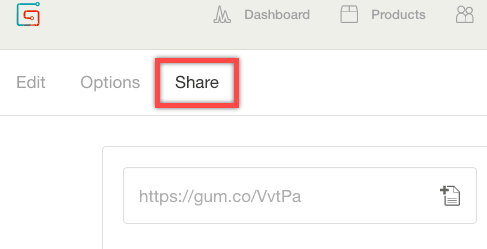
Make sure you’re on the “overlay” tab.
Check the “Auto-trigger the payment form” button and then copy the code by clicking the green button.
By checking this box, you’re going to save your prospect some time by eliminating a click and presenting them with the payment form.
As Nir Eyal wrote in his book, Hooked, How to Build Habit Forming Products, the more steps you can eliminate in a process the higher likelihood you have of increasing user adoption.
So why not eliminate a step in the purchasing process to get more people to buy?
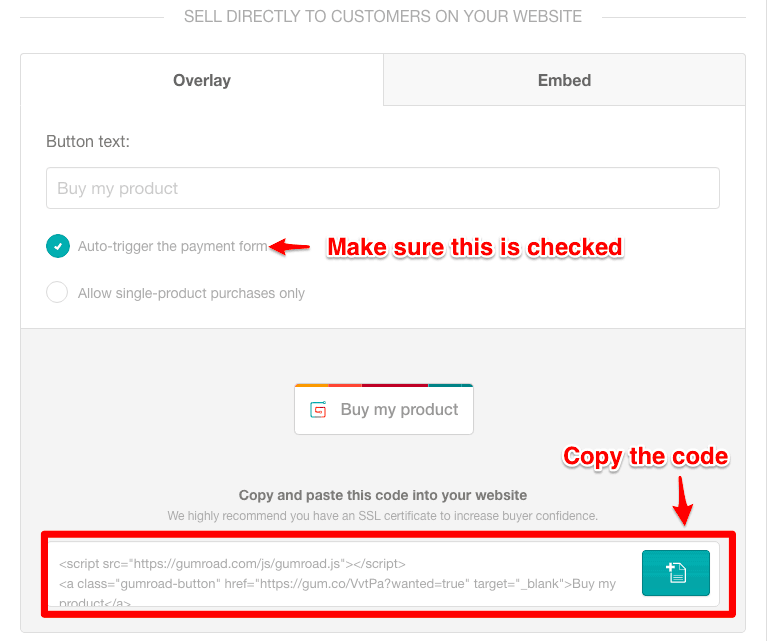
Now paste this code in Word, Google Docs or any kind of note taking application.
Step 3) Add the code to your Leadpages template
Now we need to take your Gumroad product and add it to the Leadpages template.
You’ll need to do this in two steps.
First, copy and paste the entire code and place it in the Head-Tag tracking code.
If your template is using the Standard builder, click Leadpages Options, then tracking code.
Paste the code and click done.
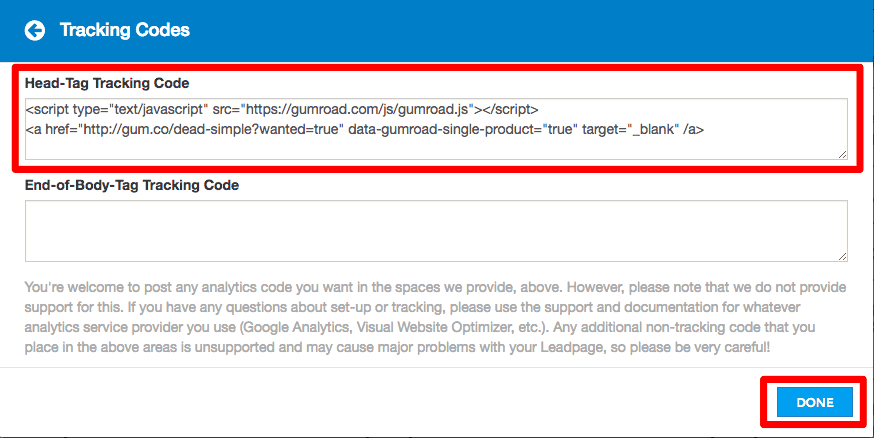
If you’re using the Drag and Drop builder, click on Tracking, Analytics, and then paste the code in the Head section.
Click Save.

The second part of adding your Gumroad code is configuring the button action on your page.
If you look at the code, you’ll notice there are two parts to it.
One is the JavaScript code that initiates the overlay box and the second is the button that has the link to your Gumroad product.

We want to take the URL out of the second part of the code – the href URL specifically.
In my example the URL is: https://gum.co/VvtPa?wanted=true
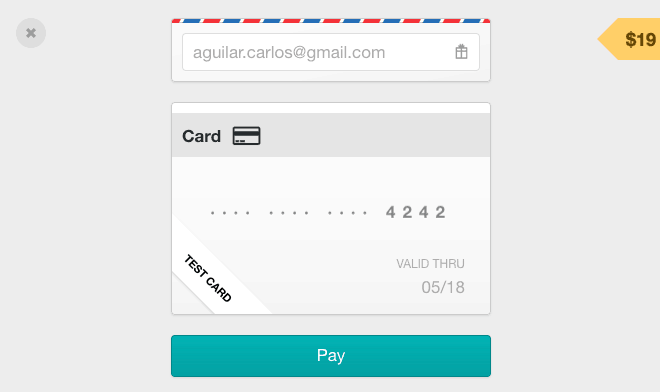
Notice the “?wanted=true”?
This is what tells Gumroad that someone wants to buy the product and will trigger the payment form.
If we didn’t have the “?wanted=true” in our code, we would simply have a snippet of the product page.
Like this:
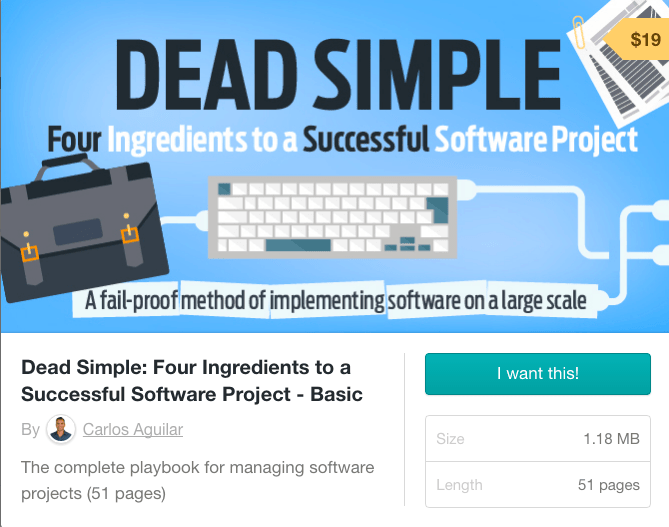
But we don’t want that.
Instead we want this:
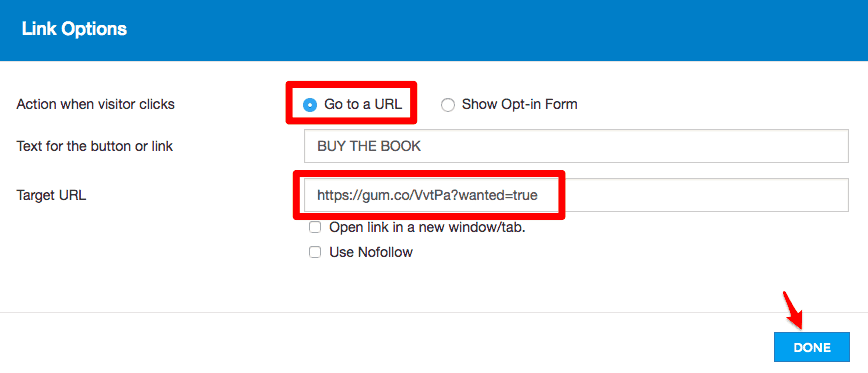
For those using the Standard Leadpages builder, click on the button you want to trigger the overlay.
Select the action of going to a URL instead of triggering the Leadbox.
Paste the URL of your product into the Target URL field and click Done.
Make sure the open link in a new tab/window is NOT checked.
If you’re using the Drag and Drop builder, select the button and choose External URL:

Paste in the URL of your product, and click Save.
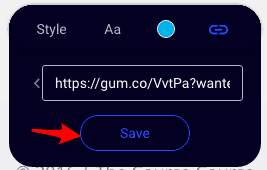
Make sure new window is unchecked and click Done.

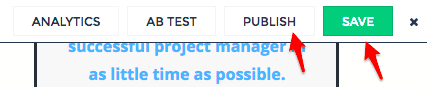
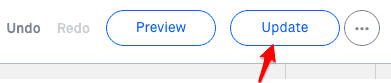
Step 4) Save and publish your page
For those using the Standard builder click Save and then Publish.
Now click “view page”.
Those using the Drag and Drop builder, click update, then “view page”.
Step 5) Test the button action
After clicking “view Page”, locate your buy button and click it.
Voila! Your Gumroad product should pop up as an overlay with the payment form at the ready.
Now you can start driving traffic (both organic and paid) to a single page to buy your products instead of sending folks to your Gumroad product page.
Conclusion
When thinking of ways to increase conversions (Gumroad sales in this case) on your website, it’s best to look at your overall sales process from a user’s point of view.
If there’s any part of the process you can reduce or eliminate, do so. Then measure to see if it moves the needle for you.
Conversion optimization isn’t about knowing the latest “hacks”, tips or tricks.
Instead it’s about creating a better user experience so people continue to visit your website and buy from.
Question for you: what’s your experience been like selling on Gumroad?
And if you found this tutorial helpful, let me know in the comments below.